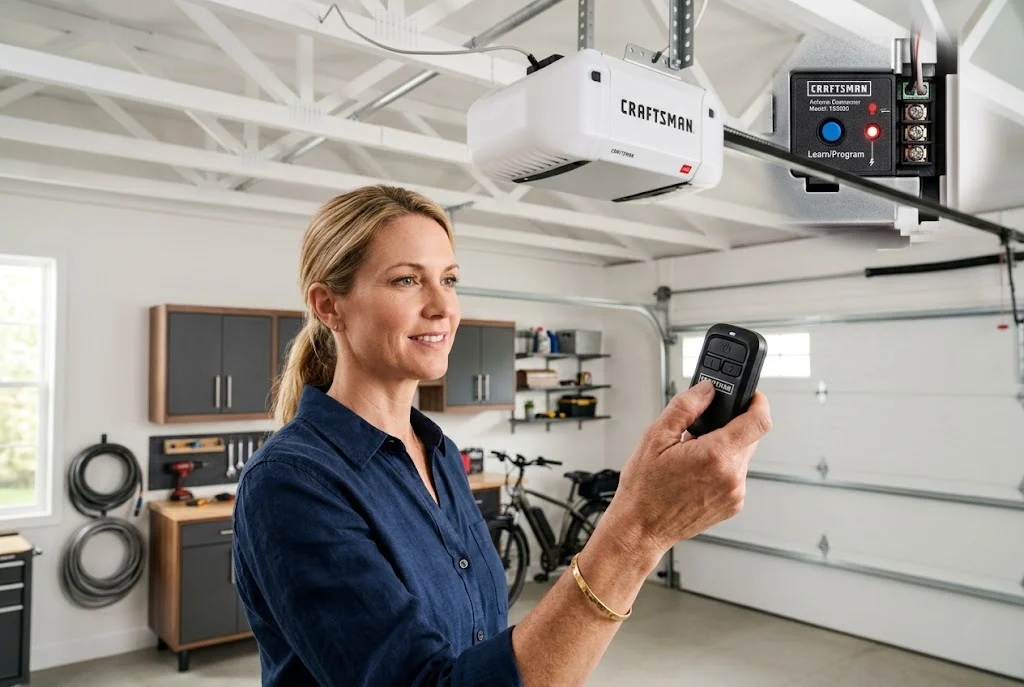
Learning how to program craftsman garage door remote is usually a straightforward process when you have the correct remote and opener combination. Whether you are adding a replacement remote, reconnecting an existing controller, or setting up an extra remote for another household member, the basic process involves putting the garage door opener into programming mode and then pairing the remote.
However, Craftsman garage door openers and remotes have changed over the years. Because of that, the exact button sequence can vary by model. Before starting, identify your opener and remote, make sure the remote has a working battery, and keep the garage door area clear. This approach can prevent unnecessary resets and help you avoid programming an incompatible remote.
How to Program Craftsman Garage Door Remote
The most common way to program a Craftsman remote is through the opener’s Learn or Program button. Older and newer Craftsman systems can use different controls, so the owner’s manual for your model should take priority whenever the sequence differs.
1. Identify Your Craftsman Garage Door Opener
Start by checking the motor unit mounted near the ceiling of your garage. Look for the model number on the opener housing, label, or documentation. Knowing the model is especially useful when selecting a replacement remote or checking compatibility.
Craftsman recommends using the product model number to locate the correct manuals and support information. This can be particularly important for older garage door systems, where accessories may not work with every opener.
2. Locate the Learn or Program Button
Look around the motor housing for a Learn, Program, or similar programming control. Depending on the opener, the button may be positioned near the terminals, antenna wire, or other control buttons.
If you are unsure where the button is located, our guide to the Learn button on a garage door opener can help you understand what to look for before starting the setup.
3. Activate Programming Mode
Press and release the appropriate Learn or Program control on the opener according to the instructions for your model. The opener may indicate that it is ready to receive a remote signal through an indicator light or another visual response.
Once programming mode is active, proceed promptly because some systems provide only a limited programming window.
4. Press the Desired Remote Button
Press and hold or press the appropriate button on your Craftsman remote, depending on the model and instructions. The opener should recognize the remote and provide some form of confirmation.
Do not repeatedly press random buttons if the first attempt fails. Instead, stop and check the instructions for your specific opener and remote combination. Incorrect sequences can make troubleshooting more confusing.
5. Test the Craftsman Remote
After programming, stand clear of the garage door and press the programmed button once. Watch the door carefully as it opens or closes. Test the remote again from a normal operating distance to confirm that the signal is reliable.
If the remote works only when you are very close to the opener, do not immediately assume that programming failed. A weak battery, interference, damaged electronics, or another issue may be responsible.
How to Set Craftsman Garage Door Remote
People searching for how to set craftsman garage door remote are generally looking for the same basic pairing process. The important distinction is that you need to match the remote to the opener before attempting to program it.
Start by identifying the opener model and remote model. Check the battery, locate the Learn or Program button, activate programming mode, and then follow the remote-specific button sequence. Finally, test the door from a safe position.
For a general overview of remote setup, see our guide to how to program a garage door remote.
How to Program a Garage Door Remote Craftsman Model
The phrase how to program a garage door remote craftsman can apply to several generations of equipment, so there is no single button combination that should be assumed to work for every Craftsman system.
Some Craftsman remotes are designed for specific opener technologies, while newer models can have updated setup processes. For example, Craftsman’s current CMX363 myQ three-button remote is listed as compatible with most Craftsman garage door openers manufactured after 1997 that have safety sensors. Each button can also be programmed individually for supported opener or gate applications.
That means compatibility should always be checked before purchasing a replacement. If you are comparing remote types, our garage door opener remote compatibility guide provides a useful starting point.
How to Program Craftsman Garage Door Opener
Another common search is how to program craftsman garage door opener. In most cases, homeowners are actually trying to program a remote, wall control, keypad, or another access device rather than program the opener motor itself.
The opener acts as the receiving unit. The accessory is then registered or paired with it through the appropriate programming procedure. Therefore, identify exactly what you are trying to add before pressing any reset or Learn controls.
If your problem involves the opener itself rather than the remote, visit our guide to the garage door opener for broader information about opener components and operation.
Program Craftsman Garage Opener: Adding an Extra Remote
If your existing remote already operates the door and you want to add another one, there is usually no reason to replace the working remote. Use the compatible additional remote and follow the opener’s programming procedure for adding another control.
This is useful when multiple family members need access. It is also a practical solution when you want a spare remote kept in another vehicle.
Keep in mind that the number of remotes and other accessories supported can depend on the opener and receiver. Follow the limits and instructions specified for your particular model rather than assuming every Craftsman system has identical capacity.
How to Reprogram Craftsman Garage Door Remote
Reprogramming a Craftsman garage door remote may be necessary when an existing remote no longer operates the opener, when a replacement remote is being introduced, or after changes to the opener’s stored remote information.
Before reprogramming, check three simple things: the battery, compatibility, and the opener’s power. A remote that appears to need programming may simply have a depleted battery.
Replacing the battery can be a quicker solution than resetting the opener. Our garage door remote battery replacement guide covers the battery side of the troubleshooting process.
Do Not Reset the Opener Unnecessarily
A complete remote-memory reset can remove previously stored controls. That means every authorized remote may need to be programmed again afterward.
If only one remote is causing a problem, first try programming or replacing that individual remote. A complete reset is better reserved for situations where you specifically need to remove old remote codes or start the access setup again.
Craftsman Garage Door Remote Troubleshooting
When programming does not work, craftsman garage door remote troubleshooting should start with the simplest possible causes. Working through the checks in order can help you identify whether the issue involves the remote, the opener, or compatibility.
Check the Remote Battery
Install a fresh, correctly positioned battery and inspect the battery contacts. A weak battery can reduce operating range or prevent the remote from sending a usable signal.
Check Remote Compatibility
A replacement remote should be compatible with the specific opener. Do not assume that a remote with the same brand name will automatically work with every Craftsman opener.
Our article about Chamberlain garage door opener remotes is useful when comparing brands and remote technologies, while the dedicated Craftsman garage door opener remote page is the better starting point for Craftsman-specific remote information.
Check the Opener’s Power
If the garage door opener is not responding to the wall control, lights, or other controls, remote programming may not be the primary problem. Check that the opener has power before spending time repeatedly programming the remote.
Look for Physical Damage
Inspect the remote casing and buttons for cracks, broken controls, corrosion, or signs of liquid damage. A physically damaged remote may fail even when the programming sequence is correct.
Test Another Compatible Remote
If a second compatible remote operates the opener normally, the original remote may be the source of the problem. This simple comparison can save time before you consider replacing the opener.
For more general remote problems, see our guide to garage door remote not working.
What If the Craftsman Remote Still Will Not Program?
If the remote still refuses to program after checking the battery and compatibility, go back to the opener model number and verify the exact instructions. This is especially important for older Craftsman garage door openers because accessories and programming methods can differ between generations.
Also make sure you are using the correct button on the remote. Multi-button remotes can often assign individual buttons to different supported devices, so programming one button does not necessarily mean every button has been configured.
If you have purchased a universal remote as a replacement, compatibility becomes even more important. Our universal garage door remote compatibility guide explains why a universal remote should be matched carefully with the opener before programming.
Should You Replace or Reprogram a Craftsman Remote?
Reprogramming is generally worth trying when the remote is physically intact and compatible with the opener. It can restore communication without requiring a new controller.
Replacement makes more sense when the remote is damaged, repeatedly loses its connection, has worn-out buttons, or fails to operate the door after the battery and programming steps have been checked.
When choosing a replacement, compare the old remote, the opener model, and the available compatibility information. Avoid selecting a remote based only on appearance.
Safety Tips When Programming a Craftsman Garage Door Remote
Garage doors are heavy moving systems, so take basic safety precautions during programming and testing. Keep children, pets, vehicles, and objects away from the door’s travel path.
Never stand beneath a moving garage door or place yourself in its path while testing a newly programmed remote. Make sure the door can move freely and stop the setup if the opener behaves unexpectedly.
For model-specific manuals and product support, use CRAFTSMAN’s official support and manuals resources.
Final Thoughts on How to Program Craftsman Garage Door Remote
Learning how to program craftsman garage door remote starts with identifying the correct opener and remote combination. From there, the typical process involves locating the Learn or Program control, activating programming mode, pairing the desired remote button, and testing the door from a safe distance.
If programming fails, avoid immediately resetting everything. Check the battery, compatibility, opener power, physical condition, and model-specific instructions first. That systematic approach can often identify the problem without unnecessary replacement or a complete reset.
Because Craftsman garage door systems have changed across different generations, the opener’s exact model number remains one of the most useful pieces of information when programming or troubleshooting a remote.
