A garage door remote battery is a small component, but when it becomes weak or stops working, your remote can suddenly appear faulty. A dead battery may prevent the controller from sending a reliable signal, reduce operating range, or make the garage door opener ignore button presses completely.
Fortunately, changing the battery is usually one of the simplest garage door remote maintenance tasks. The important part is choosing the correct battery, installing it in the proper direction, and checking the remote afterward. This guide explains common battery types, replacement steps, warning signs, troubleshooting methods, and what to do when a fresh battery does not solve the problem.
What Is a Garage Door Remote Battery?
A garage door remote battery supplies the electrical power needed for the transmitter inside the remote control. When you press a button, the battery powers the circuitry that sends a wireless signal to the garage door opener or receiver.
The battery type depends on the remote model. Some controllers use small coin-cell batteries, while older remotes can use larger batteries. Because of these differences, you should never select a replacement battery simply because it physically fits inside the remote.
Check the existing battery, remote model number, manufacturer’s instructions, or the label inside the battery compartment before purchasing a replacement.
Common Battery Types for Garage Door Remotes
Many modern remotes use compact lithium coin-cell batteries. Other garage door controllers, particularly older models, can use different battery formats.
For example, Genie documentation shows that its GT912 one-button remote uses a single 9V battery, while its Universal 2-Button Remote uses a CR2032 coin-cell battery. This demonstrates why checking the exact remote model matters before buying a new battery.
Some remotes may also use CR2025, CR2016, AAA, or other battery types. Even when two coin cells look nearly identical, their thickness and specifications can differ.
How to Identify the Correct Battery
The easiest method is to remove the existing battery and read the number printed on it. Match the new battery to the same type whenever the remote manufacturer’s instructions specify that battery.
You can also check the remote’s manual or manufacturer support page. Avoid guessing based only on battery shape.
Signs Your Garage Door Remote Battery Needs Replacing
A weakening battery can produce several warning signs before it stops working completely. Recognizing these symptoms can prevent you from mistaking a simple power problem for a defective garage door opener.
The Remote Works Only at Close Range
If your remote operates the garage door only when you are standing very close to the opener, the battery may be losing power. A weak transmitter can result in reduced operating range.
Other factors can also affect range, so replacing the battery is a useful first troubleshooting step rather than an automatic diagnosis.
The Remote Works Intermittently
An old battery may provide enough power for some button presses but not others. If the remote works occasionally and then stops, replace the battery before performing a complete reprogramming procedure.
The Indicator Light Is Weak or Does Not Activate
Many remotes have an indicator light that illuminates when a button is pressed. A noticeably weak light or no light at all can indicate a battery problem, although damaged electronics can cause similar symptoms.
The Garage Door Stops Responding
When a previously reliable remote suddenly stops opening or closing the door, the battery should be one of the first things you check.
For additional troubleshooting, see our guide to garage door remote not working.
How to Replace a Garage Door Remote Battery
The exact opening method varies between remote models, but the general process is simple.
1. Identify the Battery Compartment
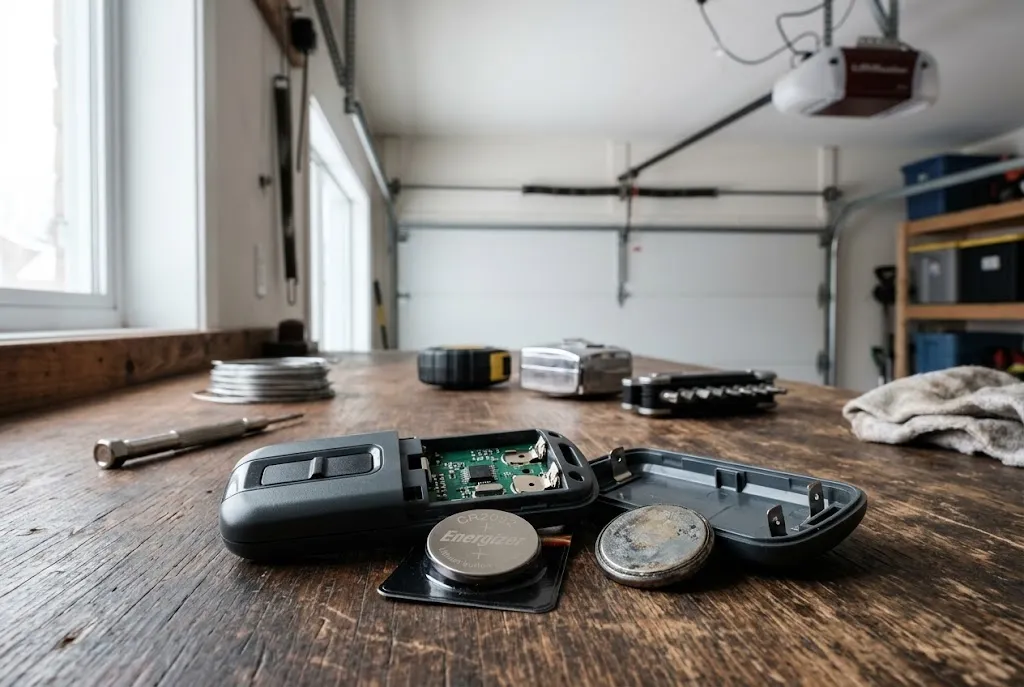
Turn the remote over and look for a battery cover, sliding panel, latch, or small screw. Some remotes open with a coin or small flat tool, while others simply slide apart.
2. Open the Remote Carefully
Open the battery compartment without forcing the casing. Excessive pressure can damage clips, hinges, or the plastic housing.
3. Note the Battery Orientation
Before removing the old battery, look at its positive and negative markings. The replacement battery must be installed in the correct direction.
4. Install the New Battery
Insert the replacement battery according to the markings inside the compartment. Make sure it is seated firmly and that the contacts touch the battery properly.
5. Close the Remote
Reinstall the cover or tighten the screw if the remote uses one. Avoid leaving the battery compartment loose because movement can interrupt electrical contact.
6. Test the Remote
Press the remote button from a safe position outside the garage door’s travel path. Confirm that the opener responds normally. Then test it from a typical operating distance.
For a more detailed battery-focused walkthrough, visit our garage door remote battery replacement guide.
Does Changing a Garage Door Remote Battery Erase Programming?
In many modern garage door remote systems, changing the battery does not erase the remote’s programming. Genie, for example, states that supported remotes retain their programming during battery replacement.
However, different remote technologies can behave differently. If your remote does not work after the battery has been replaced, do not immediately assume that the programming has been erased.
First verify the battery type, installation direction, and battery contacts. Then test the remote again. If necessary, follow the programming instructions for your specific remote and opener.
Garage Door Opener Remote Battery vs. Regular Remote Battery
The terms garage door opener remote battery and garage door remote battery generally describe the same basic component: the battery inside the handheld transmitter used to control the garage door opener.
The important distinction is the battery specification, not the terminology. Two remotes from different manufacturers can look similar while requiring completely different batteries.
This is particularly important when replacing batteries in remotes made by Chamberlain, LiftMaster, Genie, Craftsman, and other manufacturers.
Battery for Garage Door Remote: How to Choose One
When looking for a battery for garage door remote, start with the manufacturer’s specified battery number. Matching the original specification is generally safer than selecting a battery based on dimensions alone.
Consider these factors before buying:
- Check the exact battery number printed on the existing battery.
- Confirm the remote model where possible.
- Use a reputable battery from a reliable manufacturer.
- Check the expiration or freshness information when available.
- Confirm the positive and negative orientation during installation.
If the remote uses a coin cell, avoid bending or damaging the battery during installation. Handle batteries carefully and keep loose batteries away from children and pets.
Garage Door Remote Control Battery Problems After Replacement
A new battery should normally improve remote performance, but several problems can prevent it from working correctly.
Wrong Battery Type
A battery that looks similar may still have different specifications. Recheck the battery number instead of relying on appearance.
Battery Installed Backward
The positive and negative sides must match the markings in the battery compartment. An incorrectly installed battery may make the remote appear completely dead.
Dirty Battery Contacts
Dirt or corrosion on the metal contacts can prevent the new battery from making proper electrical contact. Inspect the contacts carefully before reinstalling the cover.
Damaged Battery Compartment
Broken clips or loose contacts can prevent a new battery from remaining securely positioned. If the battery moves when the remote is shaken lightly, the casing or compartment may need repair or replacement.
Remote Electronics Are Faulty
If a correct fresh battery does not restore operation, the remote itself may be damaged. Water exposure, drops, worn buttons, or internal electronic failure can all cause problems that a battery change cannot fix.
How Long Does a Garage Door Remote Battery Last?
There is no single lifespan that applies to every garage door remote battery. Battery life depends on the remote design, battery type, usage frequency, environmental conditions, and how long the battery has been stored before installation.
A remote used many times every day may require replacement sooner than a spare remote that is used occasionally. If you notice declining range or intermittent operation, replacing the battery is generally a sensible first step.
Extreme temperatures can also affect battery performance. If a remote is frequently exposed to harsh heat inside a vehicle, its battery may not perform the same way as one stored in a more moderate environment.
Should You Reprogram the Remote After a Battery Change?
Usually, you should test the remote before attempting to reprogram it. If the remote worked correctly before the battery became weak, installing a fresh battery may be all that is needed.
Reprogramming becomes more relevant when the remote still does not communicate with the opener after the battery has been confirmed as correct and functional.
If programming is necessary, our guide to how to program a garage door remote provides broader information about the process.
Garage Door Remote Battery Replacement for Different Brands
Battery requirements vary between manufacturers and remote generations. You should therefore avoid assuming that one battery works across every controller.
Chamberlain
Chamberlain produces several remote families, and the battery requirement depends on the specific controller. Identify the exact remote before purchasing a replacement.
For Chamberlain-specific remote information, see our Chamberlain garage door opener remote guide.
LiftMaster
LiftMaster remotes also use different battery configurations depending on the model. Check the remote label and manufacturer’s documentation before changing the battery.
Genie
Genie’s remotes demonstrate particularly well why model identification matters. Different Genie remote models can use different batteries, so the correct battery should be selected from the model-specific instructions.
Genie’s official support documentation confirms, for example, that its GT912 remote uses a single 9V battery, while its Universal 2-Button Remote uses a CR2032 coin cell.
When a New Battery Does Not Fix the Remote
If the remote still does not work after installing the correct battery, troubleshoot the system rather than replacing parts at random.
First, verify that the opener itself has power. Next, check the remote’s physical condition and test it from several distances. If another compatible remote works normally, the original controller may be defective.
You should also confirm compatibility if the remote was recently replaced. A controller that is not designed for your opener may not function even with a perfectly good battery.
Our garage door opener remote compatibility guide can help when the issue involves a replacement or universal remote.
When Should You Replace the Entire Garage Door Remote?
A battery replacement is inexpensive and worth trying when the controller is otherwise in good condition. However, replacing the entire remote can make more sense when the casing is cracked, buttons are broken, contacts are corroded, or the remote continues to fail after a correct battery and proper programming.
Before buying a replacement, record the old remote model and the garage door opener model. This information can help you select a compatible controller instead of purchasing one that only looks similar.
Our guide to garage door remote replacement provides additional considerations for choosing a new controller.
Safe Handling of Garage Door Remote Batteries
Small batteries should be handled responsibly. Keep loose batteries away from children and pets, and do not place used batteries in locations where they can be accidentally swallowed or damaged.
Do not puncture, crush, burn, or intentionally short-circuit a battery. Follow local disposal requirements for used batteries, particularly for lithium coin cells.
Also avoid leaving a partially opened remote where small parts can fall out. After replacing the battery, make sure the casing is securely closed before returning the controller to regular use.
Final Thoughts on Garage Door Remote Battery Replacement
A reliable garage door remote battery is essential for consistent wireless access to your garage. When a remote becomes weak or stops responding, checking the battery is one of the simplest troubleshooting steps available.
The best approach is to identify the exact remote model, match the correct battery specification, install it with the correct polarity, and test the controller before changing programming settings. If a new battery does not solve the problem, investigate compatibility, physical damage, opener power, and remote programming next.
Because manufacturers use different battery types across their remote models, there is no universal battery that should be assumed to fit every garage door controller. A few minutes spent checking the model and battery number can prevent unnecessary purchases and troubleshooting.
