The learn button on garage door opener systems is an important control used to program compatible remotes, keypads, and other wireless accessories. If you are replacing a garage door remote or trying to reconnect an existing transmitter, finding this button is often the first step.
Although the basic idea is simple, the location, color, and programming sequence can vary between garage door opener brands and models. This guide explains what the garage opener learn button does, where to look for it, how learn-mode programming works, and what to check when a remote will not sync.
What Is the Learn Button on Garage Door Opener?
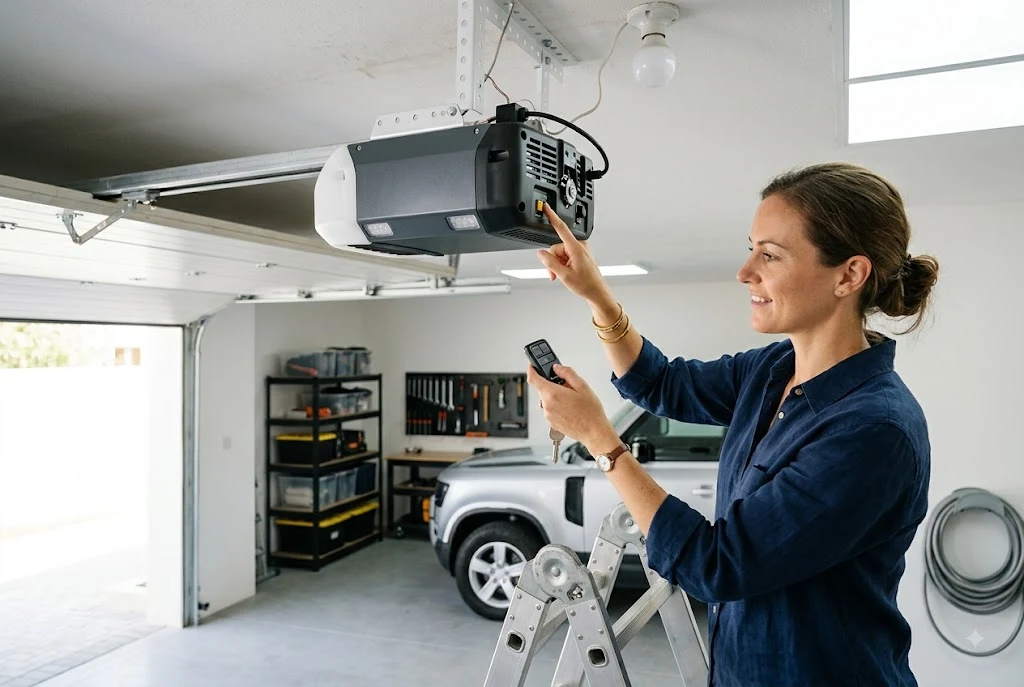
The learn button on garage door opener systems is typically a small programming button located on the opener motor unit. It allows the opener to enter a programming mode so that it can recognize an authorized wireless device.
Depending on the opener, the button may be labeled “LEARN,” “PROGRAM,” or use another manufacturer-specific designation. On many residential openers, it is located near the antenna wire, control terminals, or under a light cover.
The button is not normally used to operate the garage door during everyday use. Instead, it is primarily involved when adding, changing, or removing wireless access devices.
Where Is the Garage Opener Learn Button?
The exact position of the garage opener learn button depends on the manufacturer and model. Start by looking at the motor unit mounted on the garage ceiling.
Check around the following areas:
- Near the opener’s antenna wire
- Beside the adjustment or control terminals
- Under or beside the light cover
- On the side or rear of the motor housing
If you cannot identify the button, check the opener’s model number and consult its manufacturer’s manual. Avoid pressing unidentified controls repeatedly because some buttons can change operating settings rather than simply initiate remote programming.
What Does the Learn Button Do?
The learn button places the garage door opener into a programming state. Once the opener enters this mode, it can receive a compatible remote’s signal and store that remote as an authorized device.
On many systems, pressing the learn button briefly activates programming mode. The opener may indicate this with an illuminated LED or another signal. You then press the appropriate button on the remote to complete the setup.
The exact timing and confirmation method vary by manufacturer and opener generation. For example, LiftMaster uses the LEARN button as part of its remote compatibility and programming process, with the button’s color helping identify supported remote technologies.
Learn Button Programming for a New Remote
Learn button programming is commonly required when installing a replacement garage door remote. Before beginning, confirm that the remote is compatible with the opener.
A general programming process is:
- Make sure the garage door opener has power.
- Locate the opener’s LEARN or PROGRAM button.
- Press and release the learn button according to the opener’s instructions.
- Press the desired button on the compatible remote.
- Wait for the opener’s programming confirmation.
- Test the remote from a safe position.
Do not assume that every opener follows exactly the same sequence. Some systems require a specific button combination or timing. The manufacturer’s instructions should always take priority over a generic programming method.
Learn Button Remote Setup: What to Check First
Before starting learn button remote setup, check the remote battery. A weak battery can prevent the opener from receiving a strong enough signal during programming.
You should also check whether the remote is compatible with the opener. Compatibility can depend on the opener’s age, security technology, frequency, and learn-button characteristics.
For LiftMaster systems, the manufacturer provides remote compatibility guidance based partly on the color of the opener’s LEARN button. Therefore, identifying this button can help you choose the correct replacement remote instead of purchasing a transmitter that cannot be programmed to your opener.
If your LiftMaster remote is already programmed but suddenly stops working, our guide to LiftMaster garage door remote troubleshooting covers battery, programming, and replacement checks.
How Learn Button Remote Sync Works
Learn button remote sync essentially establishes communication between the remote and the opener. The opener temporarily listens for a compatible wireless signal, and the selected remote button sends its identification or security information.
Once the opener accepts the signal, it stores the remote according to its programming system. Pressing that button later should allow the opener to recognize the authorized transmitter.
Modern garage door systems may use rolling-code or other security technologies rather than a simple permanent code. As a result, programming a remote is generally more secure than simply entering a fixed code into the opener.
Garage Door Opener Learn Mode Explained
Garage door opener learn mode is the temporary state in which the opener is ready to accept a new wireless device. It is usually activated through the learn button.
Because the programming window may only remain active for a limited period, prepare the remote before activating learn mode. Keep the remote within the recommended range and know which button you want to assign.
If you wait too long before pressing the remote button, the opener may leave programming mode. In that case, you may need to start the process again.
Can the Learn Button Program More Than One Remote?
Many garage door openers can store multiple compatible remotes. This is useful for households where several people need independent access.
However, each opener has its own memory capacity and programming rules. If the opener has reached its limit, adding another remote may require removing an old device first.
When programming several remotes, test each one individually after setup. This makes it easier to identify which device has a problem if one transmitter fails to operate the opener.
How the Learn Button Relates to Garage Door Remote Codes
The learn button is closely connected to garage door remote coding. Instead of manually entering a code on many modern systems, the opener can learn and store the authorized remote through its programming process.
If you need to change access or replace an old transmitter, understanding the learn button can make the process much easier. Our guide on how to change a garage door remote code explains the broader difference between adding a remote, reprogramming it, and clearing stored access.
Keep in mind that clearing the opener’s stored memory can affect multiple wireless devices. A complete memory reset may remove remotes or keypads that are still in use, requiring them to be programmed again.
What If the Learn Button Does Not Program the Remote?
If the remote does not sync after using the learn button, begin with the simplest checks. Replace the remote battery if necessary and confirm that the opener has power.
Next, verify compatibility. A remote can be perfectly functional and still fail to program if it uses a technology that the opener does not support.
Also, check whether the opener actually enters learn mode. An LED indicator or other manufacturer-specific signal may confirm that programming mode is active. If there is no indication, consult the opener’s manual for the correct procedure.
The problem may be with the new remote, if another known-compatible remote works normally while the new remote does not. If multiple programmed remotes fail simultaneously, investigate the opener rather than assuming every remote is defective.
Should You Hold the Learn Button?
Be careful when holding the learn button. On some garage door opener models, briefly pressing the button starts programming mode, while holding it for a longer period can perform a different function, such as clearing stored remote controls.
For that reason, do not hold the button simply because the remote did not program on the first attempt. Follow the instructions for the exact opener model instead.
This is particularly important when several family members use different remotes. Accidentally clearing the opener’s memory could disconnect every stored transmitter and create unnecessary reprogramming work.
When Professional Garage Door Help Is Needed
Programming a remote is generally separate from repairing the mechanical garage door. If the remote is programmed correctly but the door does not move, look for other symptoms.
A door that is stuck, moves unevenly, reverses unexpectedly, makes unusual noises, or has damaged springs, cables, or tracks may require professional service. Do not attempt to repair high-tension garage door components without appropriate training and equipment.
If the opener itself shows unusual behavior after programming, professional diagnosis can help determine whether the issue involves the receiver, control board, safety system, or another component.
Final Thoughts on the Garage Opener Learn Button
The learn button on garage door opener systems is one of the most useful controls for remote programming and wireless access management. It allows compatible remotes and other devices to be added to the opener without replacing the entire system.
Start by identifying the correct learn button, confirming remote compatibility, and following the manufacturer’s programming sequence. Avoid unnecessary resets because clearing stored memory can remove other devices that still need access.
Once you understand learn-mode programming, replacing and setting up garage door remotes becomes much easier. You can also continue building your knowledge with our related guide to garage door remote code changes and the upcoming article covering Mastercraft garage door opener remotes.
