Learning how to program garage door remote Genie can help you restore access after buying a replacement remote, adding another controller, or reconnecting an existing remote to your opener. Genie programming procedures vary by remote and opener model, but most modern systems use a Program or Learn control on the opener followed by a specific sequence on the remote.
Before you start, identify the model of your Genie garage door opener and remote. Genie provides model-specific programming guidance because different remotes and opener generations can use different button sequences. Keep the remote close to the opener during setup, and make sure people, pets, vehicles, ladders, and other obstructions are clear of the garage door path before activating the system.
How to Program Garage Door Remote Genie
The easiest way to approach Genie remote programming is to treat the opener and remote as a matched system. First identify the remote, then locate the opener’s programming button, activate programming mode, and complete the remote-button sequence.
1. Identify Your Genie Remote Model
Start by looking at the back or inside of the remote for its model number. Genie uses several remote families, including different Intellicode transmitters, and each model can have its own programming instructions.
Genie’s official support center provides model-specific instructions and allows users to select the remote that most closely matches the controller they have. This is particularly useful if you are programming an older remote or a newly purchased replacement.
You can also review our guide to Genie garage door opener remotes for additional information about remote types and selection.
2. Locate the Program or Learn Button
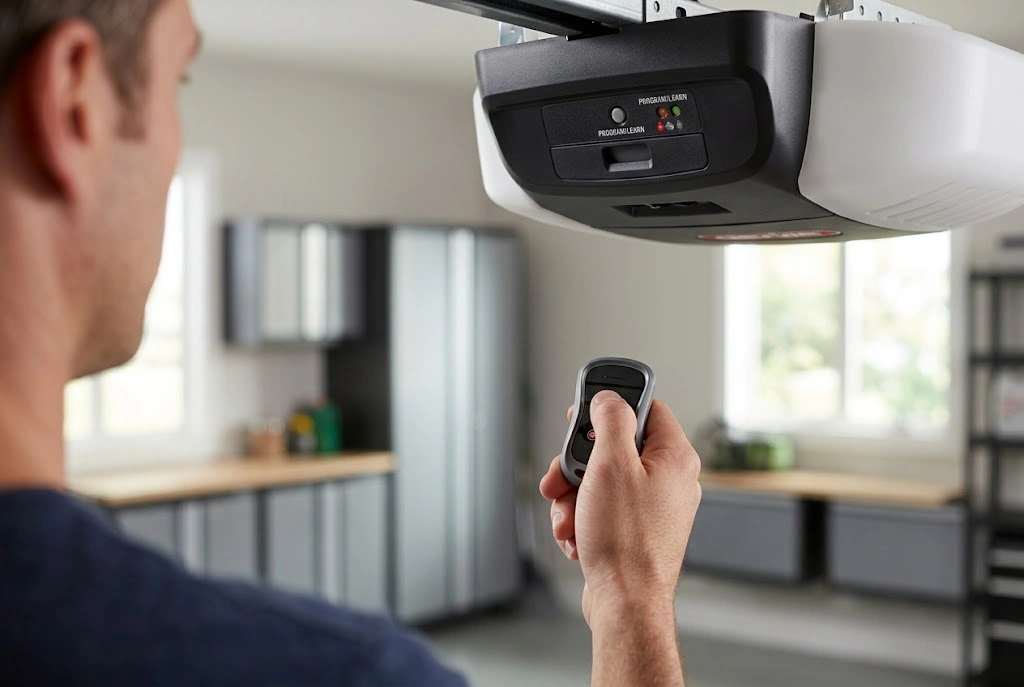
Next, inspect the garage door opener mounted on the ceiling. Depending on the model, the programming control may be labeled Program, Set, or Learn Code. On some Genie systems, you may need to look around the motor head or beneath the light cover.
The shape, position, and labeling of programming controls can vary. If you cannot identify the correct button, check the owner’s manual before pressing controls at random.
3. Put the Opener Into Programming Mode
Newer Genie garage door openers can use a Program/Set button to enter programming mode. Older Genie systems can use a Learn Code button. The indicator lights on the opener normally provide visual confirmation that programming mode has been activated.
The exact sequence depends on the opener generation. For example, Genie’s current instructions for certain newer openers use the Program button until the round LED changes to blue, while older systems can use the Learn Code button until its indicator begins flashing.
Because these sequences are model-specific, do not assume that a programming method used on one Genie opener will work on another.
4. Program the Remote Button
Once the opener is ready, press the remote button you want to assign to the garage door. Some Genie remotes require the selected button to be pressed more than once during setup.
For example, Genie’s G3T three-button remote instructions specify a sequence in which the selected button is pressed and released twice during programming, followed by a third press to operate the door. The opener’s lights provide confirmation during the process.
Other Genie remotes use different sequences, which is why identifying the exact remote model before starting is important.
5. Test the Remote
After the programming sequence is complete, move to a safe operating position and press the programmed button once. The garage door should respond normally.
Test the remote again from a normal distance. If it works only when you are very close to the opener, the problem may be related to the battery, interference, remote damage, or another issue rather than programming.
How to Reprogram a Genie Garage Door Remote
People searching for how to reprogram a genie garage door remote are often dealing with an existing remote that no longer operates the opener. Reprogramming can restore communication when the remote has lost its setup or when the opener’s remote settings have changed.
For supported Genie models, the reprogramming process generally starts by placing the opener into programming mode and then teaching the desired remote button to the opener. Genie’s official instructions specifically note that certain G3T remotes can be reprogrammed even if they worked previously.
However, do not erase the opener’s remote memory unless you actually need to remove all stored remotes. A full memory clear can remove every programmed remote and keypad, meaning each authorized device must be added again afterward.
How to Reprogram Genie Garage Door Remote Without Replacing It
If the remote is physically intact, replacement should not be the first step. Start by checking the battery and then attempt the correct programming procedure for the remote model.
A fresh battery can restore a remote that appears to have stopped working. If the battery is good but the opener still does not respond, reprogramming may be the next logical step.
Our guide to garage door remote battery replacement can help you rule out a simple battery problem before resetting the remote or opener.
Genie Garage Door Remote Programming for New Remotes
Programming a new Genie remote is usually similar to reprogramming an existing one, but compatibility should be checked before you begin.
Genie states that it can guarantee Genie-brand remotes and keypads for Genie openers, while non-Genie brand remotes are not guaranteed to be compatible. Therefore, choosing a remote based only on appearance or price can create unnecessary programming problems.
When purchasing a replacement, compare the remote model, opener model, and technology. Our universal garage door remote compatibility guide is also useful when considering a universal controller.
Program Garage Door Remote Genie: Common Problems
If the remote does not program on the first attempt, avoid repeatedly pressing buttons without checking the setup. Most programming problems can be narrowed down through a few simple checks.
The Remote Does Not Enter Programming Mode
Check that you are using the correct Program, Set, or Learn control on the opener. Also verify that the opener has power and that its indicator lights behave as expected.
If the opener itself is not responding to the wall control or other commands, the issue may involve the opener rather than the remote.
The Opener Does Not Recognize the Remote
Confirm that the remote is compatible and that you followed the exact sequence for that model. Genie publishes separate instructions for different remotes, so the number and timing of button presses can vary.
If you are using an unfamiliar replacement remote, verify its model number before continuing.
The Remote Works Only at Close Range
A short operating range can point to a weak battery or another signal-related issue. Replace the battery with the correct type and make sure it is installed according to the polarity markings.
You can also inspect the remote for physical damage or test another compatible controller.
The Programming Sequence Times Out
Some Genie remotes provide only a limited amount of time to complete the programming sequence. For example, Genie’s G3T instructions specify an approximately 30-second programming window after the opener enters programming mode.
Have the remote ready before activating programming mode so you can complete the next step without unnecessary delay.
What Happens When You Clear Genie Remote Memory?
Resetting or clearing remote memory is different from simply programming one remote. When all remote-control memory is erased from a supported Genie opener, previously programmed remotes and keypads may stop working until they are programmed again.
This can be useful when a remote has been lost or stolen and you want to remove previously authorized devices. However, it should not be the first troubleshooting step for a single remote that has stopped responding.
Genie’s instructions for certain opener generations explain that clearing remote memory removes all programmed remote devices and keypads from the powerhead. Afterward, the authorized remotes must be programmed again.
How to Program Genie Remote After Changing the Battery
A battery replacement does not automatically mean that the remote needs to be programmed again. In many cases, a properly installed replacement battery restores normal operation without changing the stored pairing.
If the remote remains unresponsive after a battery change, first verify the battery type and orientation. Then test the remote near the opener. If it still does not operate the door, follow the correct reprogramming instructions for your model.
Genie’s G3T programming documentation, for example, specifies a CR2032 coin-cell battery for that particular remote model, while other remotes can use different batteries. Always verify the battery requirement for your specific controller.
How to Program Garage Door Remote Genie for Multiple Openers
Some multi-button Genie remotes can be assigned to more than one compatible opener, with individual buttons configured for separate doors. This can be convenient for households with multiple garages or properties using compatible systems.
The programming method depends on the remote model and the opener technology. Assign one remote button at a time and test each door separately so you know exactly which button controls each opener.
When working with universal transmitters, compatibility and identification become especially important. Avoid assuming that the same setup sequence applies to every brand or receiver.
When to Replace a Genie Garage Door Remote
Reprogramming is worth trying when the remote is compatible and physically sound. Replacement becomes more appropriate when the controller has broken buttons, a cracked case, liquid damage, corroded battery contacts, or persistent signal problems.
Before buying a replacement, record the opener and remote model numbers. This can help you avoid ordering a controller that looks similar but uses a different programming method or technology.
For broader remote-replacement information, see our garage door remote replacement guide.
Safety Tips During Genie Remote Programming
Garage door programming can cause the opener to activate unexpectedly. Genie specifically advises keeping people, pets, vehicles, ladders, and other obstructions clear of the garage door’s path before activating the system.
Never stand beneath a moving garage door or place yourself in its travel path. Keep the remote and programming controls accessible without reaching into a moving mechanism.
For model-specific programming instructions, use Genie’s official remote programming support.
Final Thoughts on How to Program Garage Door Remote Genie
Understanding how to program garage door remote Genie starts with identifying the correct remote and opener models. From there, the basic process is to activate the opener’s programming mode, follow the correct button sequence, and test the remote from a safe position.
When programming fails, check compatibility, battery condition, opener power, button timing, and model-specific instructions before performing a full reset. This approach reduces unnecessary troubleshooting and helps protect the remote settings of other authorized devices.
Genie has multiple remote and opener generations, so there is no universal button sequence that should be applied to every model. Using the manufacturer’s instructions for the exact remote remains the most reliable way to complete the setup.
For additional remote-programming guidance, our broader guide to programming a garage door remote provides useful context across different opener systems.
